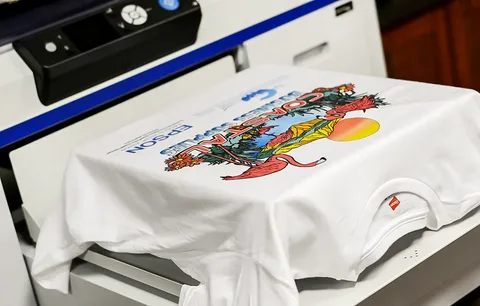
Direct-to-Garment (DTG) printing is a modern and efficient method for creating high-quality, custom-designed shirts. Unlike traditional screen printing, DTG printing allows for full-color, detailed designs to be printed directly onto fabric. This method is ideal for small batches, one-off designs, and intricate artwork. This article will guide you through the step-by-step process of making DTG printed shirts near me, covering everything from design preparation to quality control.
Step 1: Preparing the Design
Conceptualizing and Creating the Design
- Identify the Purpose: Understand the goal of your shirt design. Are you creating merchandise, promotional items, or personal gifts? This will influence your design choices.
- Target Audience: Consider who will be wearing the shirt. Demographics such as age, gender, and interests can guide your design process.
- Sketching Ideas: Start with rough sketches to brainstorm and refine your ideas before moving to digital tools.
Digital Design
- Software Tools: Use graphic design software like Adobe Illustrator, Photoshop, or CorelDRAW to create your design.
- Resolution: Ensure your design is at least 300 DPI (dots per inch) for crisp and clear prints.
- File Format: Save the final design in a format that supports high quality and transparency, such as PNG or TIFF.
- Color Mode: Use RGB color mode, which is suitable for digital printing and will produce vibrant colors.
Step 2: Selecting the Right Fabric
Choosing the Fabric
- 100% Cotton: Cotton is the preferred fabric for DTG printing due to its excellent ink absorption and vibrant color output.
- Blends: Cotton-polyester blends can also be used but may produce slightly different results in terms of color vibrancy and durability.
- Specialty Fabrics: Some printers can handle other materials, but testing is recommended to ensure quality.
Preparing the Fabric
- Pre-Washing: Wash the shirts to remove any sizing or chemicals that could interfere with ink adhesion and to account for any shrinkage.
- Lint Removal: Use a lint roller to remove any debris from the surface of the shirt, ensuring a smooth printing area.
Step 3: Pre-Treatment of the Fabric
Applying the Pre-Treatment Solution
- Purpose: Pre-treatment helps the ink bond with the fabric, enhancing print quality and durability, especially on dark fabrics.
- Application Method: Use a pre-treatment machine or a handheld sprayer to apply an even layer of the solution to the print area.
- Drying: Dry the pre-treated area using a heat press at around 320°F (160°C) for 30-60 seconds, ensuring the fabric is completely dry before printing.
Step 4: Setting Up the DTG Printer
Printer Preparation
- Ink Cartridges: Ensure that the ink cartridges are full and properly installed. DTG printers use CMYK inks, and some models also use white ink for printing on dark fabrics.
- Print Settings: Adjust the printer settings based on the fabric type and the complexity of the design. Higher quality settings will yield better results but may take longer to print.
Loading the Shirt
- Platen Setup: Secure the shirt onto the printer’s platen, making sure it is flat and wrinkle-free to avoid misprints.
- Alignment: Align the shirt accurately to ensure the design prints in the correct location.
Step 5: Printing the Design
Software Configuration
- Design Upload: Load your design into the DTG printer’s software.
- Sizing and Placement: Adjust the size and placement of the design on the virtual template, ensuring it fits well on the shirt.
- Color Adjustments: Fine-tune the colors if necessary to match the intended output, considering the fabric color.
Printing Process
- Initiate Printing: Start the printing process. The printer will apply the ink directly onto the fabric in a precise pattern.
- Monitoring: Observe the printing process to ensure there are no issues such as ink clogs, misalignment, or color discrepancies.
Step 6: Post-Printing Treatment
Curing the Ink
- Heat Press: Use a heat press to cure the ink, which ensures it adheres properly to the fabric and becomes wash-resistant.
- Temperature and Time: Follow the manufacturer’s guidelines, typically pressing at 320°F (160°C) for about 90 seconds.
- Protective Sheet: Place a protective sheet (such as parchment paper) between the shirt and the heat press to prevent any direct contact that could damage the print.
Step 7: Quality Control
Inspecting the Finished Product
- Print Quality: Check the shirt for any imperfections, such as smudges, misalignment, or faded colors.
- Durability Test: Conduct a wash test to ensure the print holds up after laundering without fading or peeling.
- Fit and Comfort: Ensure the shirt fits correctly and that the fabric feels comfortable to wear.
Step 8: Packaging and Distribution
Packaging
- Presentation: Fold the shirts neatly and package them in individual poly bags to protect them from dust and damage during shipping.
- Branding: Include branding elements such as tags, labels, or custom packaging to enhance the customer experience and build brand recognition.
Shipping
- Shipping Methods: Choose reliable shipping methods that ensure timely and safe delivery to customers.
- Tracking: Provide tracking information to customers for transparency and assurance.
Conclusion
Creating DTG printed shirts involves a meticulous process that combines art and technology. From designing high-resolution artwork to carefully selecting fabrics and managing the printing process, each step is crucial to producing high-quality custom shirts. DTG printing offers unmatched flexibility and precision, making it an ideal choice for small batches and intricate designs. By following these detailed steps, you can ensure that your DTG printed shirts meet the highest standards of quality and appeal, whether for personal use, business, or promotional purposes.
